Thursday, 30 September 2010

Vegetable and Dimer (Egg) Chop

This is such a typical, inexpensive Calcutta street-food *and* Bengali home-made snack, I'm surprised I didn't post the recipe already. Given our love for deep-fried stuff, this is really not that bad--and I say this with the authority of someone with abnormally high cholesterol, so you can trust me on this.

Ingredients:
Potatoes--peeled and finely sliced.
Carrots--peeled, finely sliced.
Turnips--peeled or not, depending on the kind you have. Also sliced.
Whole coriander. Oh, all right, coriander powder will do.
Salt, sugar.
Eggs--hard boiled (optional)

This is weally weally easy. First, you slice/chop the vegetables quite thin, so they soften quicker in boiling water.


When a fork goes through the carrots easily, drain the excess water (retain a quarter cup of water in it to help make things smoother) and mash everything together well. Some people like to retain a few recognisable bits of vegetables for that sudden what's-this-in-my-mouth delight, but, meh. I'm pretty take it or leave it when it comes to mash consistency.

 
Now in a skillet/frying pan/wok, heat a little oil. Spread it around. Slowly ladle the mash. Sprinkle freshly-ground coriander, salt and a pinch of sugar and fold it in together over a low flame.


If using eggs, shell the hard-boiled eggs under a cold tap. Slice them into halves.

Now cake each half-egg in the flavoured vegetable mash. If not using eggs, simply shape a lump of mash into a tapering oval. This is what we call the chop.


Make a batter with one egg and a fourth cup of milk. After dipping each chop in the batter, roll then in bread crumbs. If one doesn't have bread crumbs handy, crush crackers OR crisply toast bread and crush them into a coarse powder. Vegetarians can skip the egg batter bit easily.


Traditionally, these are deep-fried and served with a tomato-cucumber-lemon juice salad. Some people even serve these with rice and mushur daal, with the salad on the side, for a light lunch. But these days, with a tiny toaster oven at home, I rub them with a little oil (sunflower oil, in my case) and bake them for 20-30 minutes, and broil/toast for a final few minutes for a crispy exterior.


Wednesday, 29 September 2010

Thukpa (Tibetan Noodle Soup)

What with winter sneaking stealthily upon us, and what with the current spate of low temps with the rain and storms, I made myself a huge bowl of thukpa that lasted me three meals. I can't believe I didn't post this recipe before. It's a great dish: easy to make, delicious, uses very basic ingredients, and quite healthy besides. My recipe is one of many thukpa recipes, with small variations on the same general theme. So if you have a slightly different recipe and prefer that, I'd love to hear all about it.


Ingredients:

Chicken, pork, seafood of preference (I always use chicken)--chicken and pork should be marinated in lime or lemon juice and salt for at least 30 minutes.

Shallots/pNeyaajkoli or pNeyaajpata ( chopped) OR basil.
Beans of any kind--chopped.
Spinach or palong/palak, which I didn't have.
Carrots--diced.
Onions--chopped.
Garlic+ginger--peeled and minced.
Noodles of any kind OR dough made with flour for dumplings.
Coriander+cumin powder (2:1)
Salt, pepper, sugar.
Soy(a) sauce.
Any other vegetable you fancy.
Dry red chilies+vinegar (optional)
Turmeric, jowan/ajwain powder (optional)

NOTE: this can very easily be vegetarian-friendly by eliminating the first ingred. and adding chunks of potatoes or soybean if one wishes.

How to:
I used simple, inexpensive egg noodles. Usually, the noodles are added directly to the pot, adding body to the thin gravy. However, since local Indian egg noodles have a lot of extra starch that can't be removed from the dish if cooked directly, I parboil and drain them separately.

Cooking noodles separately also gives you the chance to stiry-fry them a little, adding more flavour to them. If using flour, make a smooth, stretchy dough with flour and water. You might want to make filled dumplings or momos as a side dish. The recipe is here.


Heat about half a tablespoon of oil in a large saucepan or a deep wok. When the oil is hot, reduce heat to middling and toss in the proteins minus the lemon juice*. If using seafood, fry them lightly and move on. If using chicken or pork, fry wel with frequent tossing till the meat changes colour thoroughly. If using soya nuggets or tofu, add them after the hard vegetables and fry them for a minute. Now, add the chopped and diced vegetables in sequence, hard vegetables first (carrots, beans), onions and minced stuff next, leafy stuff after that (chopped spinach) and delicate ones (shallots) at the very last minute.

* If using red chillies marinated in vinegar, make a paste of the chilies, a teaspoon of vinegar, a dash of salt and a teaspoon of a flavoured oil, like sesame (til) or olive oil.


When the vegetables are well fried, add the drained noodles and toss like mad till it's all been mixed together very well. Now add as much crushed black pepper as you can stand, salt, and a pinch of sugar. Mix in well. Now sprinkle the cumin, coriander, a tiny pinch of turmeric and fold in well. If the noodles seem undercooked, add half a teaspoon of oil and toss everything well. Finally, all soy(a) sauce according to taste and mix that in well as well. The dish at this stage is ready o be served, but it's just stir-fried noodles.


Add enough water so it stands half an inch above the noodles. Cover and simmer for five to ten minutes, depending on how thick you want your thukpa.


Break an egg on it and scramble, or leave it unscrambled. Or scramble an egg separately and garnish with it, if you like.

Tuesday, 28 September 2010

Taking Stock

So, I thought a friend was having a bit of a laugh when she asked me if I could get her a few tins of vegetable stock from the US when I came home. I haha-ed, and of course didn't get her any. Imagine my surprise, then, when she looked utterly disappointed and told me coldly that if I had no intention of helping her, I should at least have told her so she could source her stock from other... well, sources.

Naturally, I asked why her own kitchen--larged and sunny and very well fitted out, unlike ours--could not be the source of the stock. Whereupon she told me, in a voice one adopts when speaking to slow children, that one couldn't make stock in a domestic kitchen. It requires too much work, and is not worth the effort.

People, I tell you. It's like nobody thinks anymore.

Since I haven't had the occasion to make stock of any kind yet, I don't have pictures, but those of you who wouldn't consider using plain water for your soups and whatnot and don't have access to tinned stocks, try this incredibly complicated industrial process instead.

Step 1: Take all the vegetables you don't want for regular meals. Old semi-dried carrots, sheem or beans that have been left at the back of the fridge for too long and are hard as sticks, the top and bottom bits of onions that we usually throw away (but peel the husk and snip away the tuft of roots). For a sharper flavour, I'd advise a bunch of coriander leaves (cilantro) or krishno tulshi/ black tulsi (basil). If you're feeling less cheap, throw in a few proper veggies in the mix. Chop these coarsely.

Step 2: heat a little oil in a deep saucepan. Just a little. If you want the stock to have a certain kick to it, fry half a teaspoon of freshly-made garlic and/or ginger paste in it. Put in all the vegetables and toss thoroughly. The oil won't be enough to actually fry them, but it will impart a strong flavour to the lot.

Step 3: Add water such that it's about 2.5 inches above the level of vegetables. Generously sprinkle crushed/ground black pepper (this can be skipped if you want to add it when making soup) and a pinch of salt. Cover and simmer for an hour or till it reduces to required consistency. Strain.

The elusive stock is ready to cook with :-)

P.S: in case of chicken and other fowl, use all the throwaway bits except the liver along with roughly chopped onions and carrots (and celery wherever available).

All The Pretty Dishes

This blog seems to have one steady reader in my friend T, one reasonably frequent reader in my school-buddy N, and occasional readers who flit through every now and then but have been kind enough to subscribe to the feeds. I seldom hear from anyone but the first two, but when I do I'm happy to say I mostly hear nice things. It is a bit galling, therefore, when an impertinent twerp I've met once takes a cursory look at the blog, uninvited, and informs me that my blog is a failure because it lacks the most important component of recipe blogs--a beautiful, food-pornesque, made-for-marketing layout.

Although from my ivory tower I make a habit of royally ignoring such twits, it occurs to me that perhaps I didn't broadcast my mission statement loud and clear, and people less a-twitter about my layout might have expectations from this blog that will never be met. So, let's have an honest mouth-to-ear about what this blog is, and emphatically is not.

This blog is not fancy. It is not sexy. The knowledge of this blog will not enhance your strike rate with desirable people. The author of this blog does not understand calorie-counting. This blog does not aspire to and shall not one day be made into a glossy (or shoddy) cookbook. This blog, being a non-entity written by a non-entity, will never make buckets, or even teaspoons of money from advertisments. Consequently, this blog is unlikely to receive chain-store sponsorship-cuddles, preventing it from giving away dressy, expensive kitcheware on first Sundays of all months beginning with the letter Q.

What this blog IS, is a compilation of recipes for people of straitened or stretched means. It uses cheap, ordinary and fresh, unprocessed ingredients usually available on both sides of the Atlantic. It is an useful guide to feeding yourself well, without shelling out half your income on dining-outs and ordering-ins. Although it snorts contemptuously at diet-food and keeps a respectful distance from the vegan lifestyle, it tickles your tastebuds and keeps you healthy, provided you get out and about a bit and don't rest your pretty posterior in front of a computer all day long (as the author of this blog does).

This blog also believes in an energy- and fashion-efficient kitchen, simply because aforementioned author is not used to anything else. All behind-the-scenes washing-up is done by hand, using minimum water. All utensils are made of unpretty but dead practical steel or cast-iron, and everything required can be covered under: wok, skillet, saucepan, metal strainer, good sharp knife, wooden spatula, perforated metal spatula (a speciality of cultures that deep-fry often and don't use kitchen towels to soak excess oil), and maybe a cutting board+potato peeler.

Now that we've made the nature of this blog unmistakably explicit, please tailor your expectation to it. And if your concern for my electronic 'success' tempts you to advise me on designers I should hire and marketing firms that will cut me a good deal to make this blog go viral... be so good as to sod off.

Wednesday, 22 September 2010

Curry Puffs, or Leftover Samosas

This is something I frequently made while I was living on my own, if I had some leftover curries (as I often did, not being a big or even a moderate eater despite my size, and eating the same curry three days in a row is not pleasant). It was especially helpful if I had people over for tea, since deep-fried artery-blockers go particularly well with strong milky chaa. It's easier to make it back home though, because not only is there a greater variety of leftovers in the fridge, our cook also sometimes makes extra dough in the morning and leaves it covered in damp cloth for the rest of the day, should guests come by or we need a quick snack. So all the effort I have to put in, really, is in rolling out the dough and frying--the easiest bits of the entire process.

So, here's how it works. Here's some leftover chicken curry, where the chicken has been pulled apart by hand. If one likes to be precise, one can upend the whole thing on a cutting board and chop it with a knife.


Now, divvy up the dough into small lechis (funny word, I know). Flatten the lechis (or little balls of dough) in between your palms. Roll it out on a chaaki or rolling board dusted with dry flour or greased with a little oil. When it's large enough, put a scoop of the curry inside. Spread the gravy all over so no part of the samosa tastes bland or doughy. Fold as shown, or in any shape of your choice. I love making funny shapes with these things.


Now, heat sunflower/canola/vegetable oil in a wok. Deep fry. Serve with chutneys, which I am too impatient to make, or with shop-bought chillie sauce. I don't like ketchup, and consequently, never have it at home.


Monday, 20 September 2010

The Calcutta Egg Roll

The Calcutta (or Kolkata) egg-roll used to be a bit of a speciality, and a FAR cry from the Chinese egg rolls one is served in restaurants. While I love both, the Cal version has a special place in my heart because:
1. I grew up eating it.
2. the relative unavailability of it outside the city, which makes it a cherished nostalgic speciality.

It can be made at home, of course, but it's usually too much effort to make the dough, make parathas, and then make eggrolls out of them. So these days I only make it at home when there is leftover rooti/roti to do away with. And it's delicious :D

P.S: This recipe can also have various add-ons depending on what's in the fridge. Cooked minced meat, a skewer of chicken, roast meat and vegetables. Everything's welcome.

Ingredients:
Roti/rooti, plain paratha, other flatbreads.
An egg for every two rolls (everything in moderation, remember)
Red onions, chopped.
Green and red chilies, chopped.
Lemon/lime, fresh sliced.
Salt.
Chunks of roast meat (optional)

How to:

Step one, chop red onions, green (and fresh red) chilies and slice a lemon/lime. Keep aside.


Step two, heat a teaspoon of sunflower/canola oil on a tawa/skillet and spread it around. Lower the flame to middling. Toss one rooti gently on it.


Step three, for old hands, fry two or more rootis simultaneously, till they acquire a nicely browned, crisp exterior. Newbies, you do this by
  • putting a second rooti on top of the first
  • and then flipping the stack.
  • Now flip just the rooti on top.
  • This way, the greased side of the first rooti now greases the ungreased side of the second rooti.
  • Flip stack again. Add a little more oil if required.
  • The only ungreased side so far, the underside of the first rootie, is now greased.
  • But flip stack and single rooties a few more times to ensure the sides are not just greased, but crisp like parathas.


Step four, keep aside.
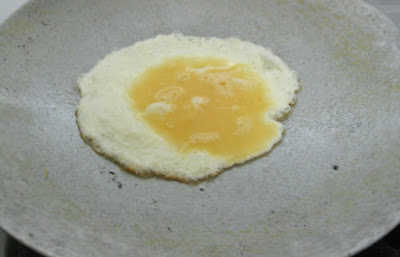
Step five, beat an egg with a touch of salt. Pour on skillet with a little more oil. Spread around. Put one crisp rooti on top of it. Let fry for a minute. Flip. Let bottom of the rooti brown for another thirty seconds.


Step six, make a row of chopped onions and chilies down the middle of the egg+rooti. Squeeze lime/lemon juice all over it. Sprinkle a little salt. Roll it up and wrap a piece of paper around it so it can be held while being eaten. The authentic Calcutta egg roll is ready to eat!


Friday, 17 September 2010